Setting up
1.
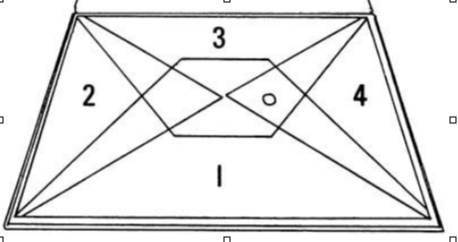
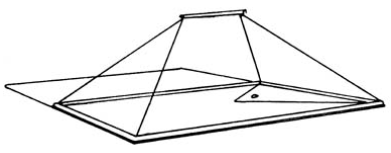
Zip open folder on a bench top. Have top spring clip to hand. Raise sides in sequence as shown. Assemble corner joints with location points on corners.
2.
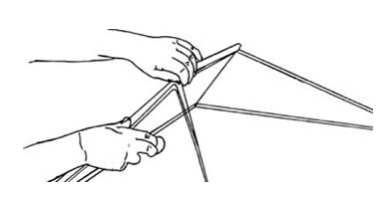
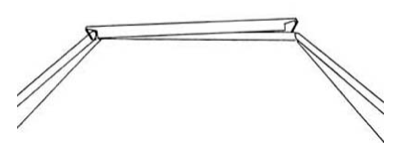
When the corners between sides 1, 2 and 3 are joined, secure with the top spring clip on the left hand end, leave the right hand end of the clip raised as shown.
3.
With fingers in the hole, raise side 4 into position. The left hand will have to prise back side 3 a little to enable the location point to be aligned on the corner joint between sides 3 and 4, the same is done for corner joint 4 and 1.

4.
When the last corner joint is located, the top spring clip is drawn to the right and lowered to engage the hook over side 4. Ensure that each corner joint is correctly aligned. The hose is screwed into the hole on side 4 one full revolution counter clockwise.
The RH Humidification Cover is now ready to be placed over the object to be humidified and connected to the outlet of the RH Thermidy Pencil or an ultrasonic humidifier. Carry the cover by the black aluminium frame.

To Pack away
1.
Place on the open zip cover and unscrew hose.
2.
Draw top spring clip to the right, raise that end and remove.
3.
Draw back side 4 with fingers of right hand through hole.
4.
Separate sides 1 and 3 with right hand while supporting side 4 on wrist and holding side 2 with left hand, now support sides 1, 2 and 3 with left hand and lower side 4 then 3, 2 and 1.

Please note:
DO NOT carry the RH Humidification Cover in a collapsed state out of the zip cover.
DO NOT use solvent or abrasive cleaners on the cover.
Left handed people may prefer to assemble the cover in a counter clockwise direction.
Please Note: RH equipment is intended for use only by professional conservators. Use by inexperienced operators may result in damage to objects being treated.